Nikon J5 mirrorless camera on 3Dr Solo - ch7 shutter

the servo arrived, but it didn't work with Solo, so I rebuilded the frame with that I liked the best and also the frame type I liked the best from previous builds
carbon fiber, alloy corners, glued with 2 component epoxy
this one is solid like a tank, and attached "perfectly" - no moves and vobles
View attachment 10564View attachment 10565
View attachment 10566View attachment 10567
View attachment 10568
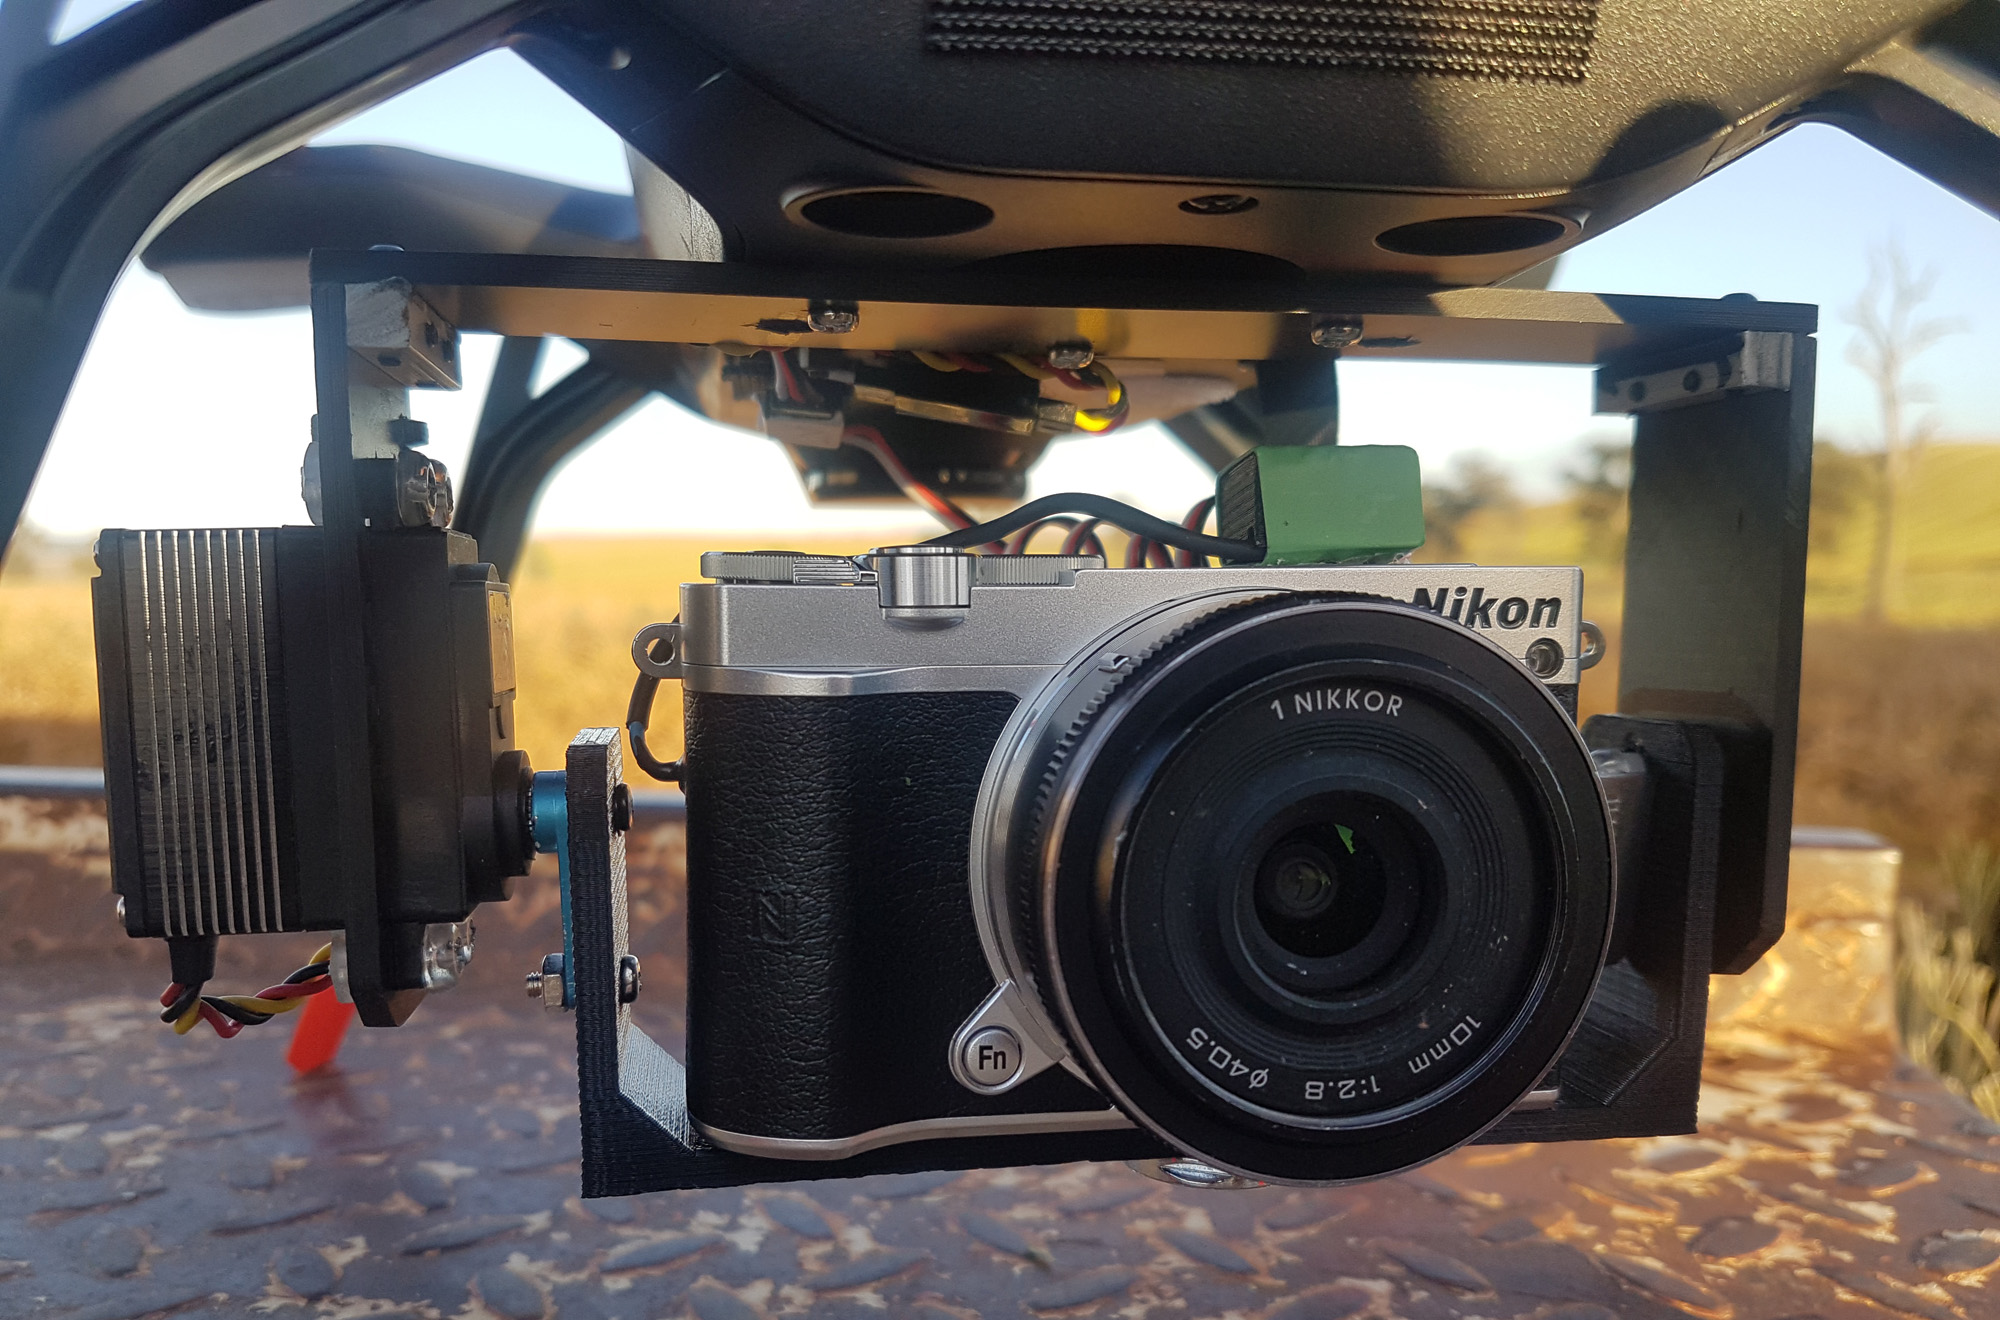
Very nice mate, similar to mine, very stiff and stable.

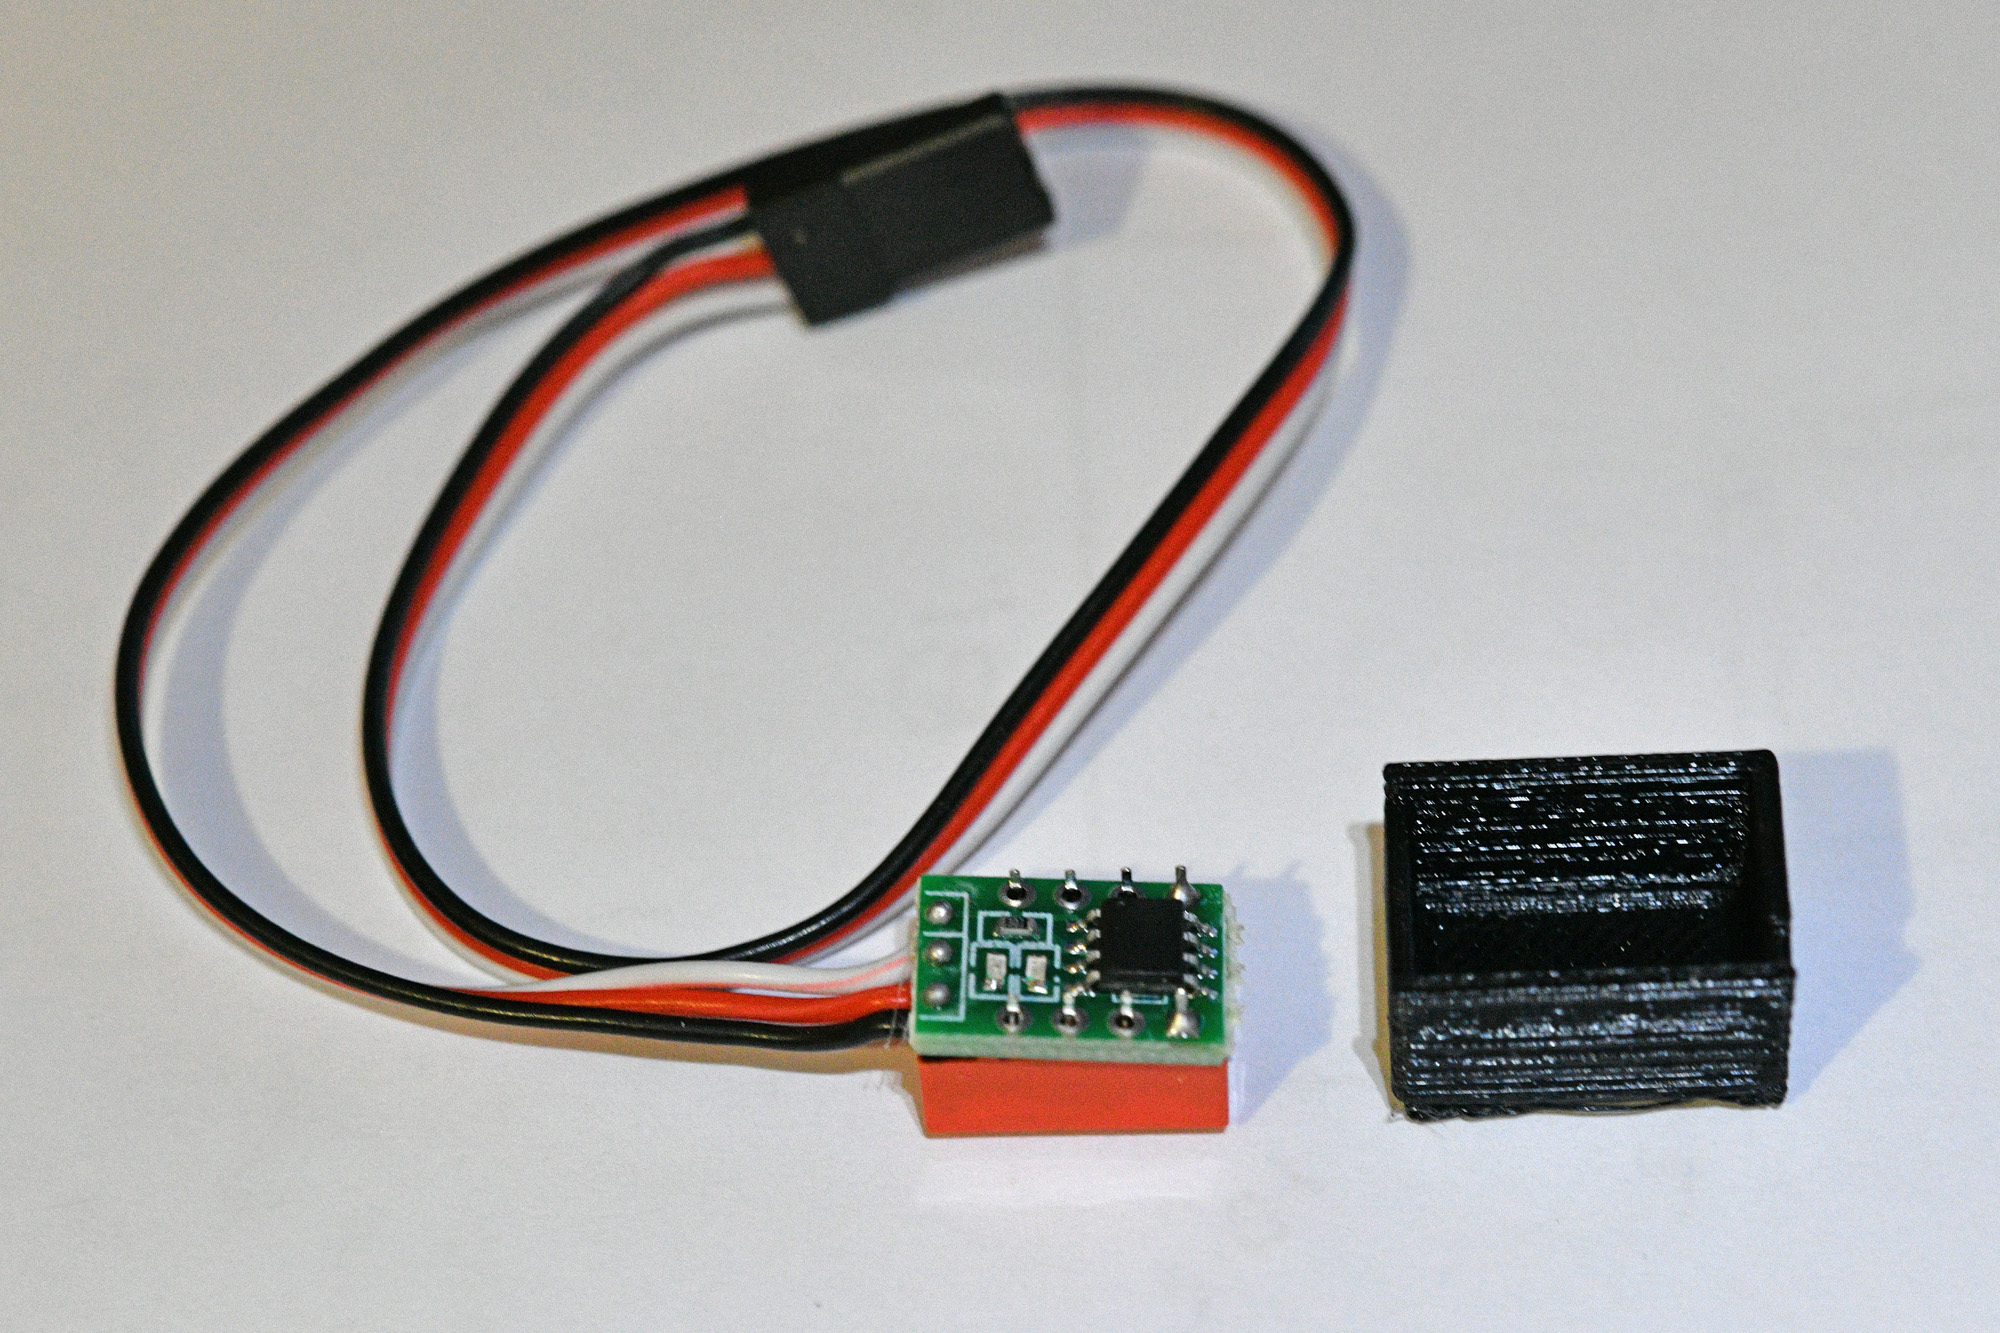
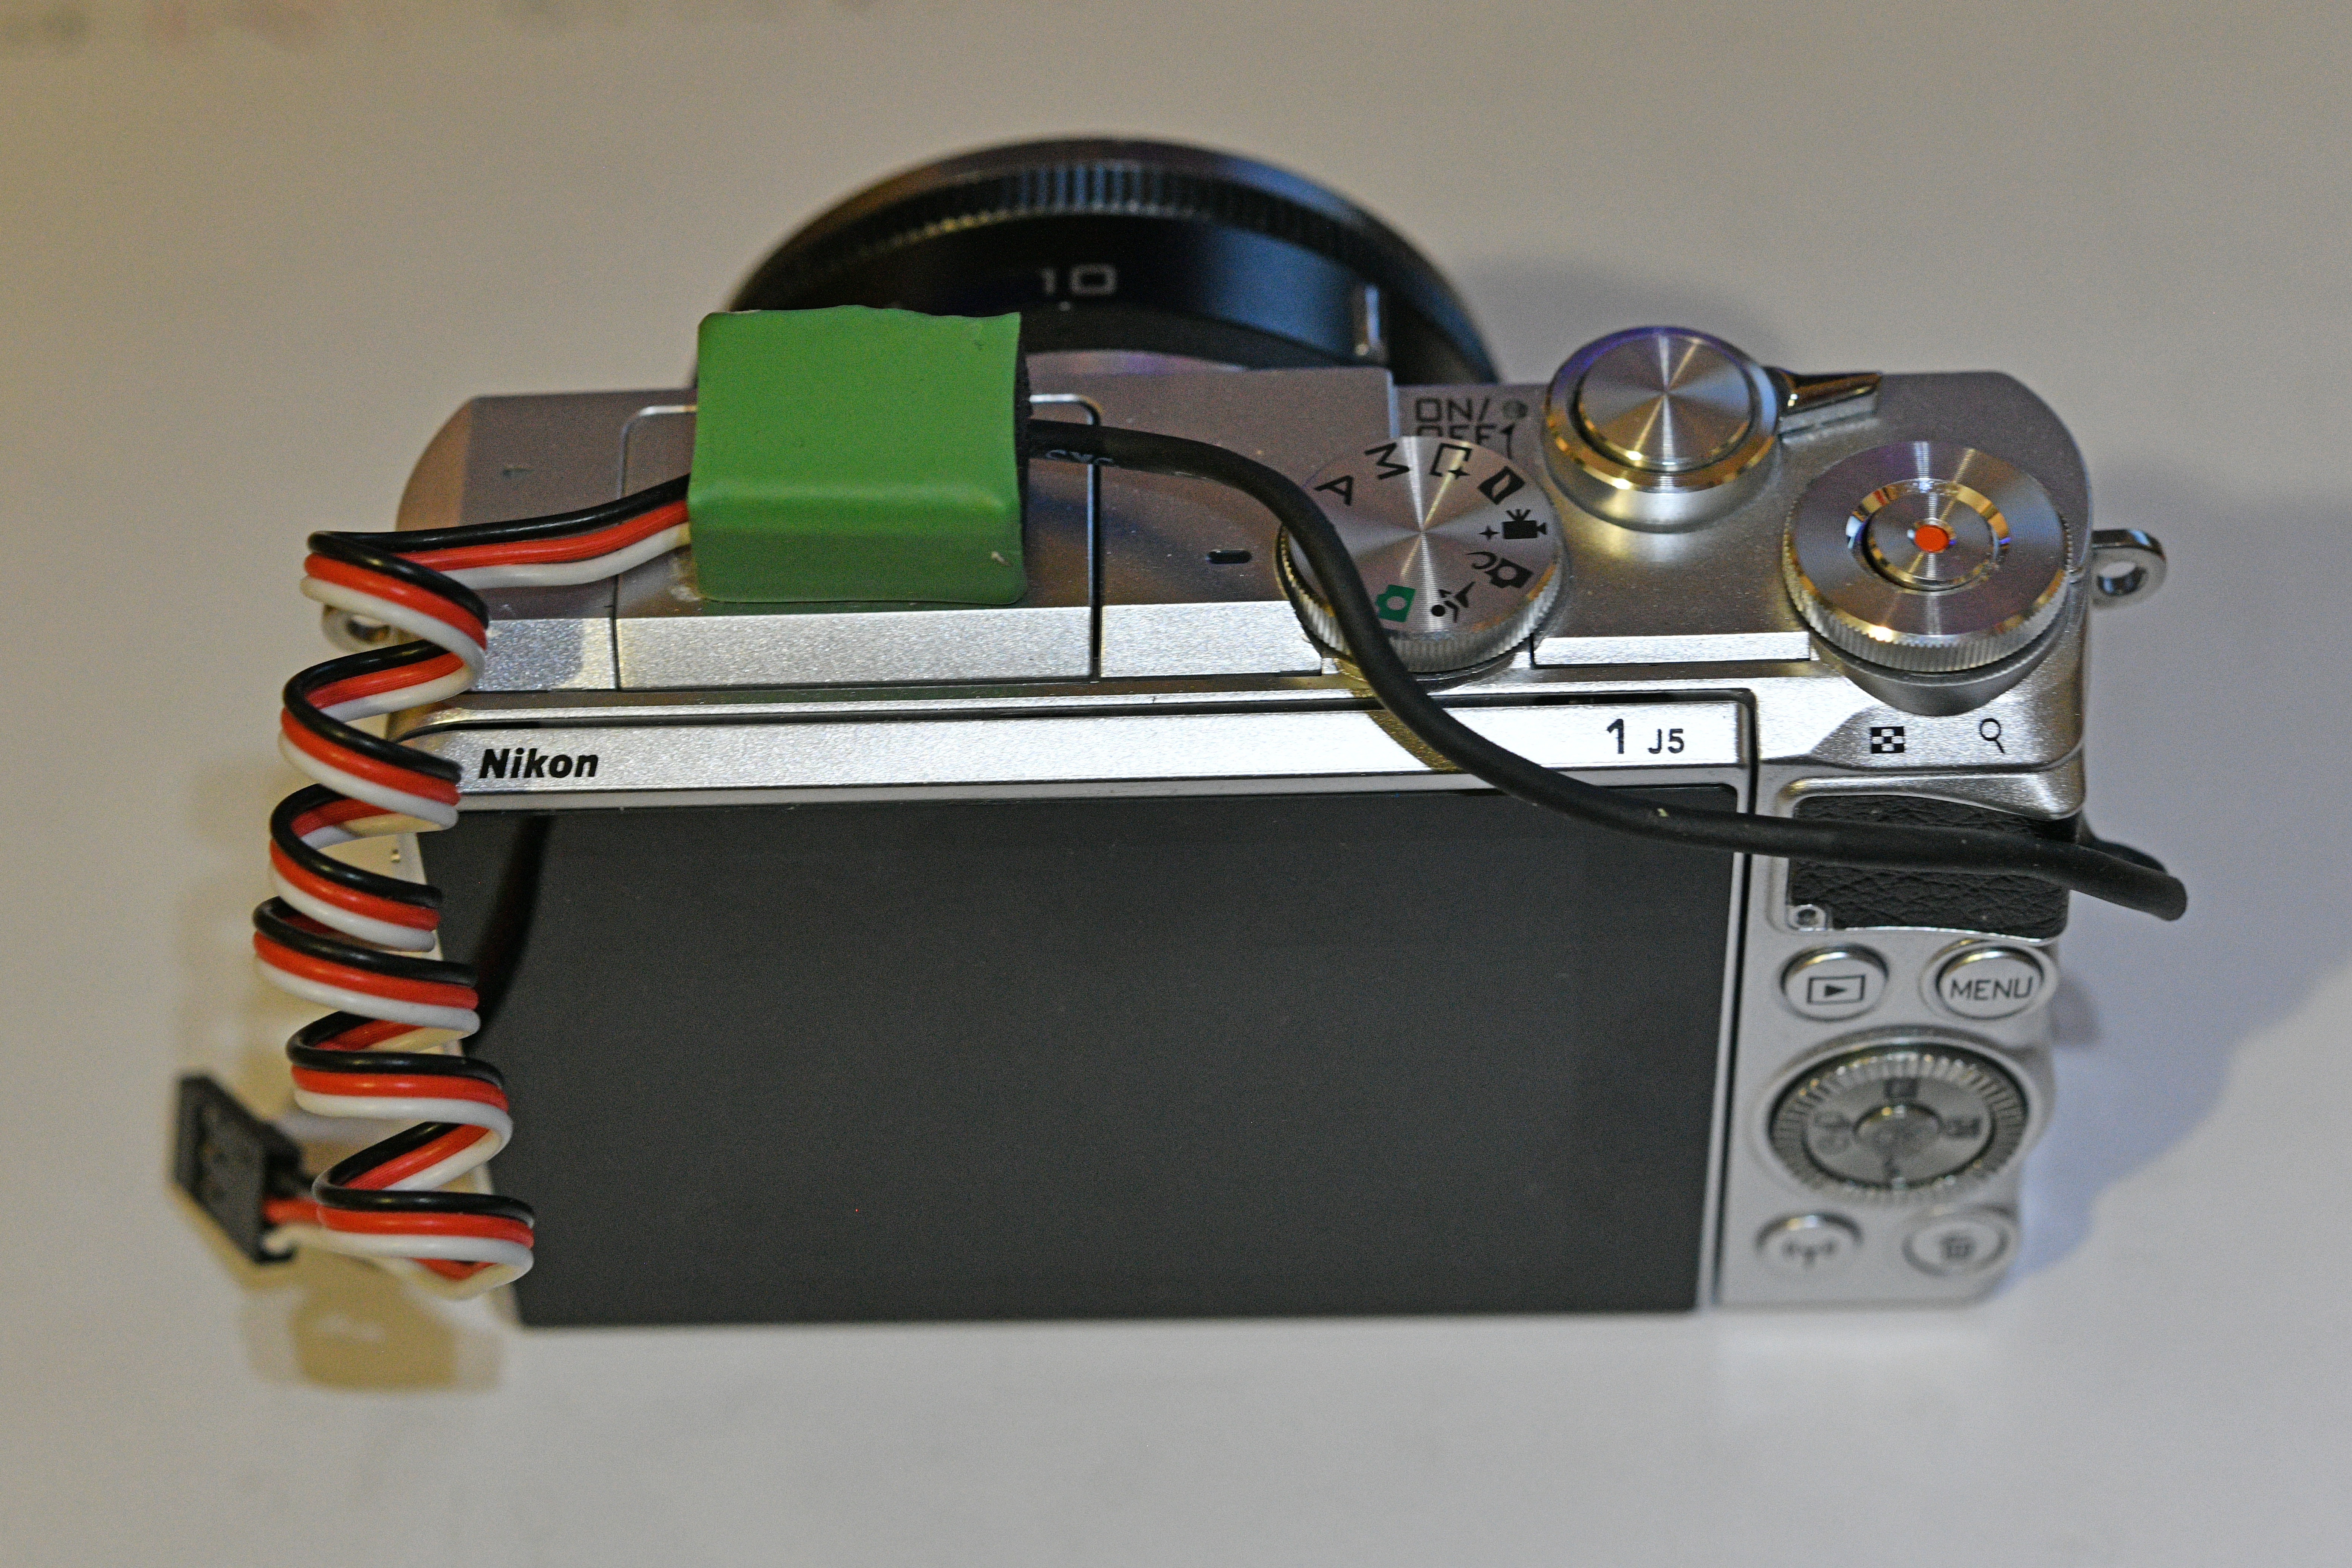
I am still waiting for the boardto arrive so I can set up and test my modified J5 and hopefully if successful, no more shutter servo ?
 
  • Like
Reactions: makatanav
For those following this post, I was using a servo to activate the shutter on my Nikon J5 as the Nikon does not have a socket for a shutter release or an IR port for remote shutter. Nikon Aust have modified one of my J5's bringing cables out of the camera to I can hook up a PWM style switch. I got a switch of Aliexpress and have successfully tested and flown this set up this morning. Much nicer than the servo. Not sure if this switch set up will work on all camera's but wanted to share the information.

Here is where I got the switch PWM switch

pwm_switch_j5_1.jpg

The switch and a little 3D box I printed to protect it

pwm_switch_j5_2.jpg

A lot less moving parts now, I put a piece of heatshrink over the box and double side taped it to the camera.

pwm_switch_j5_4.jpg

Need to get some better double sided tape, this was after this mornings test flights.

A few pics here from this mornings test flight - 3DR + NO-GoPro image thread
 
the servo arrived, but it didn't work with Solo, so I rebuilded the frame...

Gents: what are your sources for the parts to build the gimbal frame? I may experiment with a simple manual carbon fiber frame but need help on where to start.

thanks.
 
the top of mine is carbon fibre 3mm from hobby king, the bottom where the camera mounts is 3d printed ( i have a small printer) the servo is from work, brand is Hitec,

Hope this helps, very happy with my set up
 
@jxo if you want really simple, use the fixed gimbal mount and make up a frame like this but in carbon, this was done in aluminium and was my first mounting of a compact camera back in 2017, very simple design
solo_3dr_lumix_mount_3.jpg
 
thanks Rob. Just toying with different frame designs. Not a fan of the gopro mount. I have quick release brackets that I would like to integrate into the frame so it can be removed quickly for adjustment or replacement to facilitate vertical orientations.

Do you buy and cut the carbon fiber as you would other materials-- like balsa or plywoods?
 
  • Like
Reactions: Robpower
thanks Rob. Just toying with different frame designs. Not a fan of the gopro mount. I have quick release brackets that I would like to integrate into the frame so it can be removed quickly for adjustment or replacement to facilitate vertical orientations.

Do you buy and cut the carbon fiber as you would other materials-- like balsa or plywoods?

The GoPro mount was the first way I mounted a compact camera, it just evolved from there into what I have now.

My mount now is very stiff, I only use this set up for stills, I still have a gimbal and hero 4 black for video but don't use it much.

I bought the carbon fibre in a small 300x200mm sheet and cut it with a dremel tool, there are probably other ways to cut it, but you need a sharp cutter as its tough.
 
Thanks Rob. The order is in. How do you all recommend making the 90 degree attachment of the carbon fiber pieces? From the photo below, looks like a joint and glue. Glue lighter than screws? What type of glue? Where to source these connector joints? Thanks!

P91102-16001.jpg
 
@jxo4
for last build (final for now ?) I used a 2mm carbon fiber (cut with dremel) & 2mm 90 degree aluminium angles and glued with two component epoxy
carbon - US $4.6 52% OFF|0.5 5MM 100X250 mm 3K Matte Surface Twill Carbon Plate Panel Sheets High Composite Hardness Material Anti UV Carbon Fiber Board-in Parts & Accessories from Toys & Hobbies on AliExpress, with 100x250mm was enough with leftowers
glue - Bison | Product
servo - US $5.0 |PDI 2504MG JX servo 0.1 sec 4.5kg core Metal Gear digital for 450 helicopter Airplane 1/18 car Remo Hobby Smax wltoys 12428-in Parts & Accessories from Toys & Hobbies on AliExpress, this is best, I have tried

mounting wise, this time I added half to the extension board (2mm screws needed) and half to "fixed camera mount".
adding only to "fixed camera mount"≠ premium stifness, couse, the "fixed camera mount" is thin plastic holding on 3 screws (only my expectation)
frame size wise - as small and tight as possible = less weight
+ balance the frame with camera, cabling etc to the center of 3DR Solo
bottom.jpg
 
Last edited:
  • Like
Reactions: Robpower
@jxo4
for last build (final for now ?) I used a 2mm carbon fiber (cut with dremel) & 2mm 90 degree aluminium angles and glued with two component epoxy
carbon - US $4.6 52% OFF|0.5 5MM 100X250 mm 3K Matte Surface Twill Carbon Plate Panel Sheets High Composite Hardness Material Anti UV Carbon Fiber Board-in Parts & Accessories from Toys & Hobbies on AliExpress, with 100x250mm was enough with leftowers
glue - Bison | Product
servo - US $5.0 |PDI 2504MG JX servo 0.1 sec 4.5kg core Metal Gear digital for 450 helicopter Airplane 1/18 car Remo Hobby Smax wltoys 12428-in Parts & Accessories from Toys & Hobbies on AliExpress, this is best, I have tried

mounting wise, this time I added half to the extension board (2mm screws needed) and half to "fixed camera mount".
adding only to "fixed camera mount"≠ premium stifness, couse, the "fixed camera mount" is thin plastic holding on 3 screws (only my expectation)
frame size wise - as small and tight as possible = less weight
+ balance the frame with camera, cabling etc to the center of 3DR Solo

Awesome, thanks much. I corresponded with a composites company and they recommended the exact same approach to constructing the frame.

You happy with the rigidity of the 2mm carbon fiber?
 
  • Like
Reactions: makatanav
Awesome, thanks much. I corresponded with a composites company and they recommended the exact same approach to constructing the frame.

You happy with the rigidity of the 2mm carbon fiber?

@jxo I think my 3mm might of been a bit of an overthought, I think 2mm would be plenty thick enough, @makatanav is happy with his mount, we have experiments with a few different versions along the way. Happy with how mine is now, very stable.
 
  • Like
Reactions: makatanav
thanks guys. What steps did you take to ensure that the center of gravity of the camera and gimbal is properly centered under the drone along both axis? I may be encountering some drone wobble b/c the extra weight is not centered properly.
 
thanks again. I have been experimenting with various parameter settings changes to smooth our the loiter without much success. Tried AutoTune with the drone loaded with the camera but this has not been successful. AutoTune should be an attractive adjustment process. In theory, with the drone loaded with the camera and frame/gimbal, it should go through an adjustment process to re-calibrate the parameters to better accommodate the extra payload. My batteries simply wear down before the process will complete.

Best,
Jim
 
@jxo - so you say it's not worth experimenting with those settings? I understud that you hud success with it and 3DR became more stable and whining went away
How and where AotoTune is done - Solex, MisionPlaner?
 
I think it IS worth experimenting. I just have not found the right set of PID adjustments to make much of a difference. I reverted some of the parameters back to where they were pre Open Solo install and changed some of the loiter PIDs and got very minor improvements. But I still have too much wobble and shaking with the Sony camera on board. I am beginning to think poor centering of the added weight is contributing. I have taken a laptop to a field and have used Mission Planner to tweak the parameters and then put the drone back in the air and check results. I need to do more of that.

My instruction from Kelly at Solex: "You can trigger an AutoTune from Solex. Make sure "Advanced" is turned on in App Settings, so you can select modes from the drop-down menu in the flight screen. Launch, switch to ALT HOLD (altitude hold) or POS HOLD and then switch to AUTOTUNE (note, start with a fresh battery). The drone will drift around and you have to keep it in position with the sticks. That will start the auto-tune process, which will take a while but ideally reach completion before you run out of battery. [I have not been able to complete the process yet.] The reason you start from POS HOLD is that the copter will try to stay in the area while it's doing its "twitch back and forth" activities during autotune."

More reading here: Arducopter Autotune Tips - how to get rock solid stabilisation with your multirotor

I also looked into reverse engineering DJI's "tripod mode" which is what we would want for the Solo (very stable hover for photos):

Jim
 
Last edited:
  • Like
Reactions: makatanav
thanks guys. What steps did you take to ensure that the center of gravity of the camera and gimbal is properly centered under the drone along both axis? I may be encountering some drone wobble b/c the extra weight is not centered properly.

I put my camera on my mount and positioned the mount on a round rod and moved the mount left or right until in sat level and balanced. That gave me a centre point and then I just mounedt it in the centre of the gimbal plate, nothing to scientific in my work and it works, I still think mine sits a bit too far forward and have made up a spare mount moving the camera mount further back like here @makatanav has his as in the image above in this post.

I have not changed any settings and fly my mount on 2 different birds both running open solo 4. All seems ot work for me.

The only time I had the wobbles is when my upper mount was too flexible (3 d printed) I changed ot carbon fibre and all ok.
 
  • Like
Reactions: makatanav
For those following this post, I was using a servo to activate the shutter on my Nikon J5 as the Nikon does not have a socket for a shutter release or an IR port for remote shutter. Nikon Aust have modified one of my J5's bringing cables out of the camera to I can hook up a PWM style switch. I got a switch of Aliexpress and have successfully tested and flown this set up this morning. Much nicer than the servo. Not sure if this switch set up will work on all camera's but wanted to share the information.

Here is where I got the switch PWM switch

pwm_switch_j5_1.jpg

The switch and a little 3D box I printed to protect it

pwm_switch_j5_2.jpg

A lot less moving parts now, I put a piece of heatshrink over the box and double side taped it to the camera.

pwm_switch_j5_4.jpg

Need to get some better double sided tape, this was after this mornings test flights.

A few pics here from this mornings test flight - 3DR + NO-GoPro image thread
Really nice work!

May I ask for the settings to trigger the camera? Or is there a "howto trigger no Gopro cameras for dummies" somewhere?
I have recently wiped the dust off my Solo and installed Open Solo 4 and Solex. Now I want to use my Sony RX100II on the Solo for manually photos and for aerial mapping. The mechanical parts like soldering cables to board and connect to camera seems pretty straight forward , but how to get the trigger signal from Solex to Solo?
 

Members online

No members online now.

Forum statistics

Threads
13,093
Messages
147,741
Members
16,048
Latest member
ihatethatihavetomakeanacc