Pro Tec Mini Breakout Board

Joined
Mar 14, 2017
Messages
42
Reaction score
2
Age
58
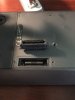
Has anyone used the Pro Mbni Break out board? If so can you help me with the installation?
I thought that it was a replacement for the board that was there but that doesn't seem to be the case.
Any help would be appreciated.
Is there a better solution for more power and options for the accessory board?
 
My understanding is that this board plugs into the 3DR Bus referred to as the "Accessory Port" on the bottom of the Solo (rubber cover).

Here's a link to the product:

Mini Breakout Board for 3DR SOLO

I mistakenly thought the USB gave access to the Pixhawk - but it's to the iMX6 board, still important and useful, but I'd like direct access to the Pixhawk.
 
I already have the board. But if you check it out ot is a male connector and the connector that is there is female. So do I plug it into the existing board or solder it to the main board.
Then how does it connect to the chasdis shell? The screw mounts do not line up with the holes drilled in the board.
These are what I need help with.
 
On the bottom of the chassis - remove the rubber protector.

The male connector mates with the female.

Here's a picture with the bare connectors.
 

Attachments

  • IMG_7198.jpg
    IMG_7198.jpg
    29.1 KB · Views: 84
Ok but then whatnor how do I connect anything else to the port?
I have a bunch of pins that need somewhete to connect. Do they go to the main board or do I connect them to any accessories I have?
 
The 3DR bus is exposed on the breakout connector of the Accessory Bay.

There are 2 versions of that "board" -- one is a full version which is documented by 3DR here:

https://dev.3dr.com/hardware-accessorybay.html

The 'full' version has plugs for the various signals available on the 3DR bus.

Then other is a limited version which only brings the pins out where you can solder something to them (and use the signals).

You have the limited version - so, you have to decide what signals you want to use and connect to the board as required.
 
  • Like
Reactions: EZL
Now this is where my lack of knowledge comes into play.
Do I leave the existing connector board in place, then plug in the piece I have and solder connections to the pins I want or need to use?
 
Yes - plug in the board - solder the pins. I'm pretty sure that both boards have the same "pin out" by the number that's listed in the development guide.
 
Thank you for your help. This doesn't seem to be the cleanest solution to more ports. I was hoping for a clean replacement to the connector that is there.
There are more pins on the breakout board than there are on the original connector. Do I need to solder the rest of the pins that I want to use to the main board? How do the pins get power and signal If not connected to the main board? Then doI have to remove any connectors from accessories that I want to attach and solder them to the pin on the board also?
I'm not sure this was the right choice for my application.
Thank for the continued help. I am very appreciative for you time and this on going dialog.
What exactly are you trying to run off this connector? Perhaps if you were a bit more Specific we could help you out, soldering wires randomly on the solo is not the way to go. There are a few "Mods" with which you have to grab/solder certain signals/Power from the board but these are related to adding different gimbal setups and perhaps a servo release mechanism. or Lidar/sonar and such...Search is your friend it's all out there.
 
Thank you for a response you are being very helpful. I want to add the lights from polar pro and a servo release drop mechanism, and maybe an anti collision strobe or some leg retracts. So I just want options really. The board has voltages and such silk screened on it and Pro-Tec has the list of pin outs. So random soldering isn't what I had in mind. I'm just asking for help and you have been great.
The real point of this all started when I broke the cable connections to the stock accessory port plug. So I thought why not upgrade if I have to solder something back to the main board. Hence the mini board. But now with the information you have helped me with, I see that this isn't the plug in replacement.
I think that with the effort I migjt be better off with the other board.
 
  • Like
Reactions: XevetS
Thank you everyone for all the great help today. This is what a community can do. We should all strive to be friendly and helpful in all aspects of life.
Yes I will keep you posted as to my out come and final decisions. I would also like to find ribbon connectors of that size as it would be easier to work with the boards if I could just unplug the connector.
Thank you all again
 
  • Like
Reactions: XevetS
Here is the info you need: I can't make the link work when I include it so just google search for Extend 3DR Solo Accessory Bay and it will be the 1st result.

Solder the pwm signals into the accessory bay connector first. Then when you plug in the breakout board to it you can connect your devices to the breakout board.
 
Last edited:
  • Like
Reactions: DJMc
Looking at the breakout board you bought it looks like they didn't attach the pins for PWM or at least they don't show it on the pinout on their website. You need the PWM signals.

Google search Brownie Boards Nano and look at that one. It gives you what you need and is smaller and doesn't stick out off the side of the Solo. You still need to solder the PWM signals to the accessory bay inside the Solo.
 
Last edited:
The 3DR bus is exposed on the breakout connector of the Accessory Bay.

There are 2 versions of that "board" -- one is a full version which is documented by 3DR here:

https://dev.3dr.com/hardware-accessorybay.html

The 'full' version has plugs for the various signals available on the 3DR bus.

Then other is a limited version which only brings the pins out where you can solder something to them (and use the signals).

You have the limited version - so, you have to decide what signals you want to use and connect to the board as required.

Thanks for the information on this! ;)
 
Thanks for the help. Will everyone give me their opinions, and ideas of other solutions and ideas for breakout boards and multiple accessories to add to my drone?

Thanks again for all the help and input.
 
Thanks for the help. Will everyone give me their opinions, and ideas of other solutions and ideas for breakout boards and multiple accessories to add to my drone?

Thanks again for all the help and input.
I am printing my mount for retractable landing gear and fishing/payload release. And I have a minimal one with no retract pads.20180307_101723_HDR.jpg20180307_102433_HDR.jpg
 
  • Like
Reactions: XevetS
Looking at the breakout board you bought it looks like they didn't attach the pins for PWM or at least they don't show it on the pinout on their website. You need the PWM signals.

Google search Brownie Boards Nano and look at that one. It gives you what you need and is smaller and doesn't stick out off the side of the Solo. You still need to solder the PWM signals to the accessory bay inside the Solo.
You can grab/solder the PWM signals from the top of the solo main board right beneath the battery tray its super simple and clearly marked, I've used PWM for retracts on my Tarot-Solo build and also on my Storm32 Gimbal for tilt control and will eventually use PWM signal for a custom drop mechanism on my Solo-Rover-1, there is alot possible with the Solo IMG_20170622_141233.jpgIMG_20180111_160920.jpgIMG_20171103_151524.jpg
great info right here >> Extend 3DR Solo Accessory Bay - Hackster.io
 
Last edited:

New Posts

Members online

No members online now.

Forum statistics

Threads
13,100
Messages
147,776
Members
16,075
Latest member
nothingworks