Do you plan to sell this PCB/BMS ? if so - can you estimate the price?
I see no opamps for each cell, no balancing. Do you plan to measure cell voltage reliably by voltage dividers only? (I see no schematic, just guess by the PCB)
Is some/all meant to be open soft/hardware ?
The hall effect current sensor will increase the price/weight more than an opamp+shunt.
You should really have serial/USB programming/config interface, is there something I don't see ?


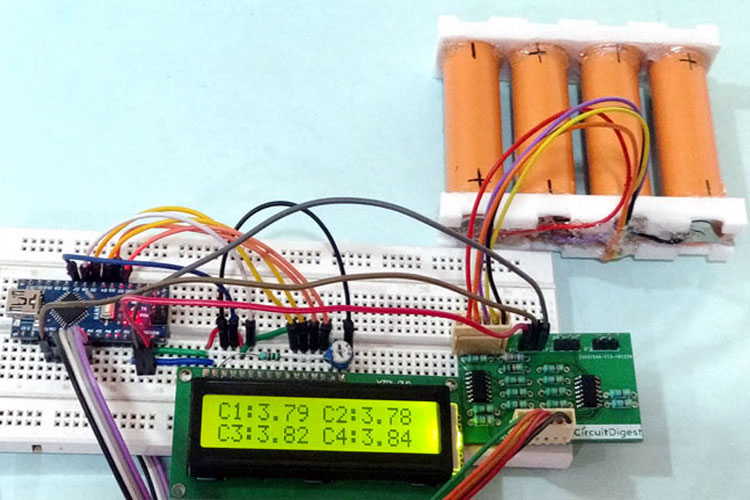
") ). It appears that if it gets a reply to a request it will keep asking but if nothing is returned it stops asking after a few tries. Earlier versions of the Solo firmware requested the Total Battery Voltage but the Green Cube and Version 4 now takes just the cell voltages.
). It appears that if it gets a reply to a request it will keep asking but if nothing is returned it stops asking after a few tries. Earlier versions of the Solo firmware requested the Total Battery Voltage but the Green Cube and Version 4 now takes just the cell voltages.